I did some measurements and figured out how big I want my Book. (I like to say this in Winifred Sanderson's voice ;) ) 16x12, but then to find paper that was at least 16x24 (Not easy!). 16x24 because I have to fold the 24 to make 12 ;) I eventually found 18x24 and just ended up trimming it down to 16.


Book Binding


So the first that I've learned about is Signatures and how to make them. I used this tutorial and this one for a guide. I also learned that you have to fold ALL the signatures & make holes in them first before you can hand sew any of them as the thread is continuous. So I've been taking my sweetass time with it, for some silly reason. I am using this post as a way to prevent more procrastination!!


Once I had ALL of my signatures together (which was alot!) 13 signatures, with 6 folded sheets per signature, for the Front section of my Book and 6 signatures, with 6 folded sheets per signature, for the Back section. Well that was the idea anyway! I ended up adding more pages to the signatures to make the book bigger. So it still has 13 sigs in the Front Section and 6 sigs for the back. Just more pages to each signature. It's around 400 pages back to back. So anyway, once you have them all cut, folded and holed you have to sew them together...Which I found to be so soothing and meditative. Once again follow those links for those AMAZING tutorials.

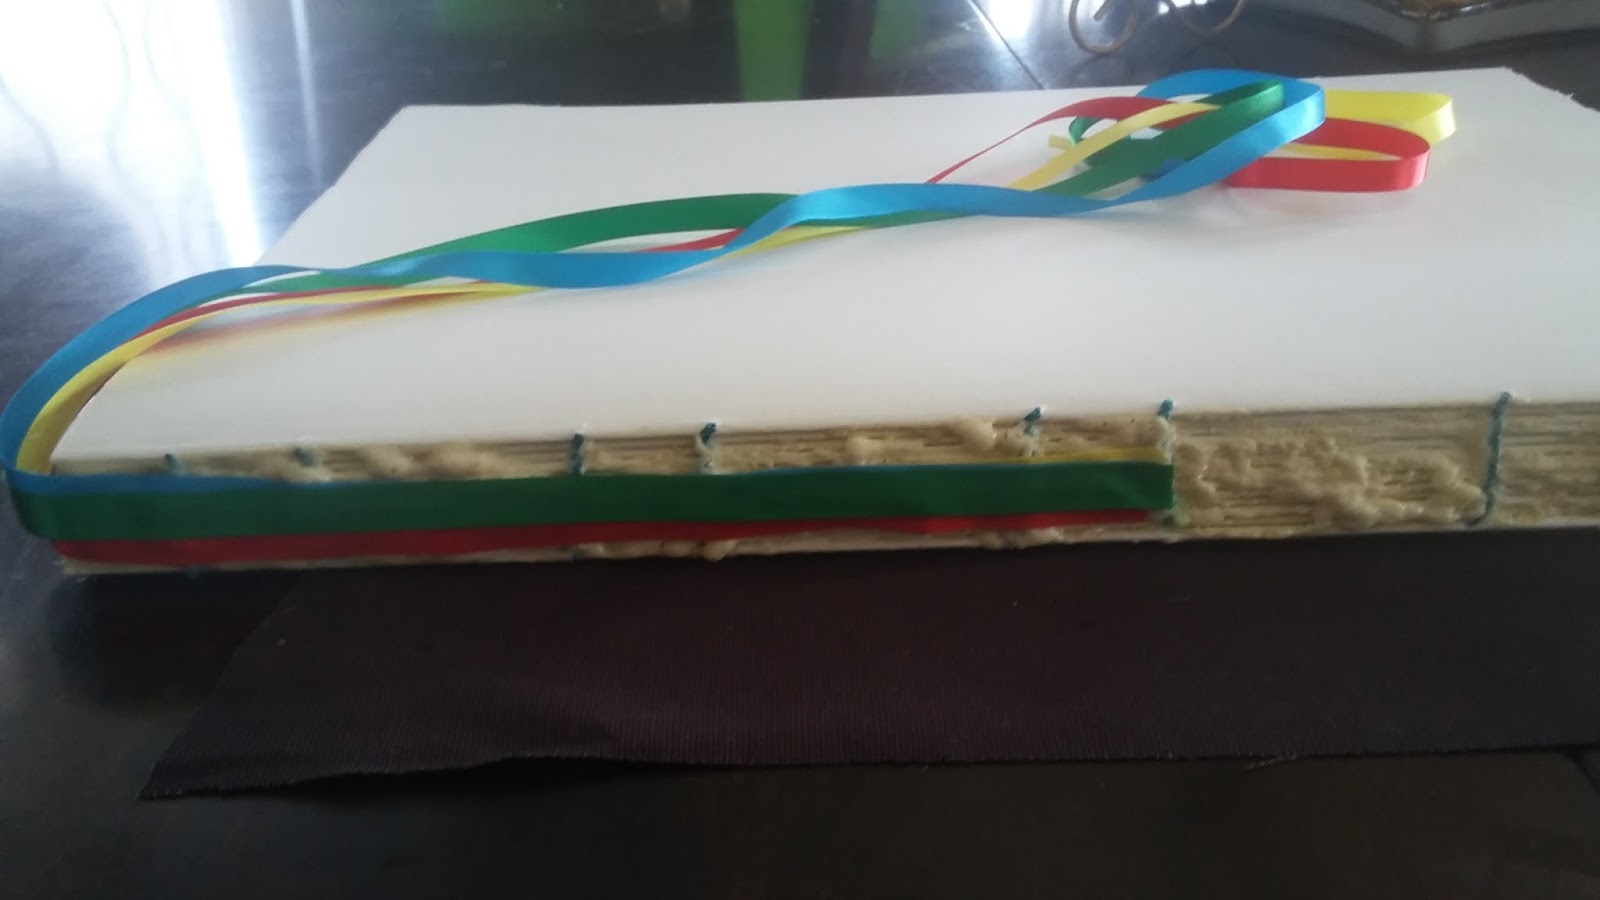
Here's the fun part. Next once they have all been sewn together in two sections. You need to glue them. The best glue I found for this is good ole' Elmers white glue. I am not kidding. That cheapass glue worked better than the $10 Grizzly glue. It's perfect for this job. Also you are going to need to invest in some good heavy metal clamps. Sorry Witches, you will need them. So get your sections completely square, I used the edge of my table for this, and make sure you have some flat wood on top of the paper to keep in pressed down evenly, clamp them together. Once they are clamped paint some white glue all over the binding. Liberally. DON'T glue to the wood!

Alright so wait for it to dry for 24 hrs. If you are putting in ribbon bookmarks glue the ends to the spine. This is also the time to get right witchy with your book. This is the spine. The Backbone. Add a little blood and some of your hair. Yep I really did just say that. Witch it up Witches. It will be Powerful as Fuck. Put that all into your spine. Let er dry 24 hrs.
Next up you are going to have to go hunt down some canvas. Not much. I bought 12 inches from a bolt. You are also going to want to buy some plywood for your covers or corrugated plastic sheets. Trust me. Just trust me. I used the thick backing cardboard from the art paper I used as pages and nope. It has slightly bent and sank from all the gluing that has been done to it. So you want to invest in something that will hold up to your gluing for a long period of time. But not too thick or heavy.
Cut your covers to be 1/4 inch longer and wider than your pages. This is important. The binding won't stick tight to the spine so you will need to accommodate with your covers. Cut your two spines exactly the same width as your book pages once the sections sit on top of each other for one spine and for the small spine you want the smaller section. Mine was two inches for the big one and one inch for the little one.
Still follow those other tutorials and just use mine for extra help. They are still way better at explaining all of this ;) I used the Pinterest one for sewing and gluing the covers on, the other one I used for closer pictures on the techniques. But mostly the Pinterest one.
So you will be cutting your canvas now. I left 1 inche of space on each end for the book (lengthwise). I cut it about two inches extra for widthwise (including the spine). Glue the spine down in the middle of your canvas. WAIT 24 hrs. While you are waiting:

Cut your chosen fabric. It has to be one WHOLE piece for all three covers and two spines. It goes Cover, Spine, Back cover, Smaller Spine, Inside Cover. Place the covers and spines 1/4 inch apart. Cut around the whole of them about 1 to 1.5 inches. If it's even 2 inches that's good too. Make slits on the corners of the two outer covers just like the tutorial. Glue the fabric overlap down just like the tutorial.

This next part is quite tricky. This took me numerous tries. Lots of tears that the whole thing was fucked. Lots of brainstorming. You want to glue your canvas to the covers. You have to do this while keeping the book open. If its closed it's too tight and won't open properly. And yet you have to find a way to keep weight on the glue. I suggest doing this one cover at a time. Wait for it to set and do the other cover. Did I do that? Nope. Will I do that in the future? I fucking hope so. Don't wait for the glue to fully set, let it set halfway and then make sure that it is opening and closing properly. It should if you glue it open and not closed.
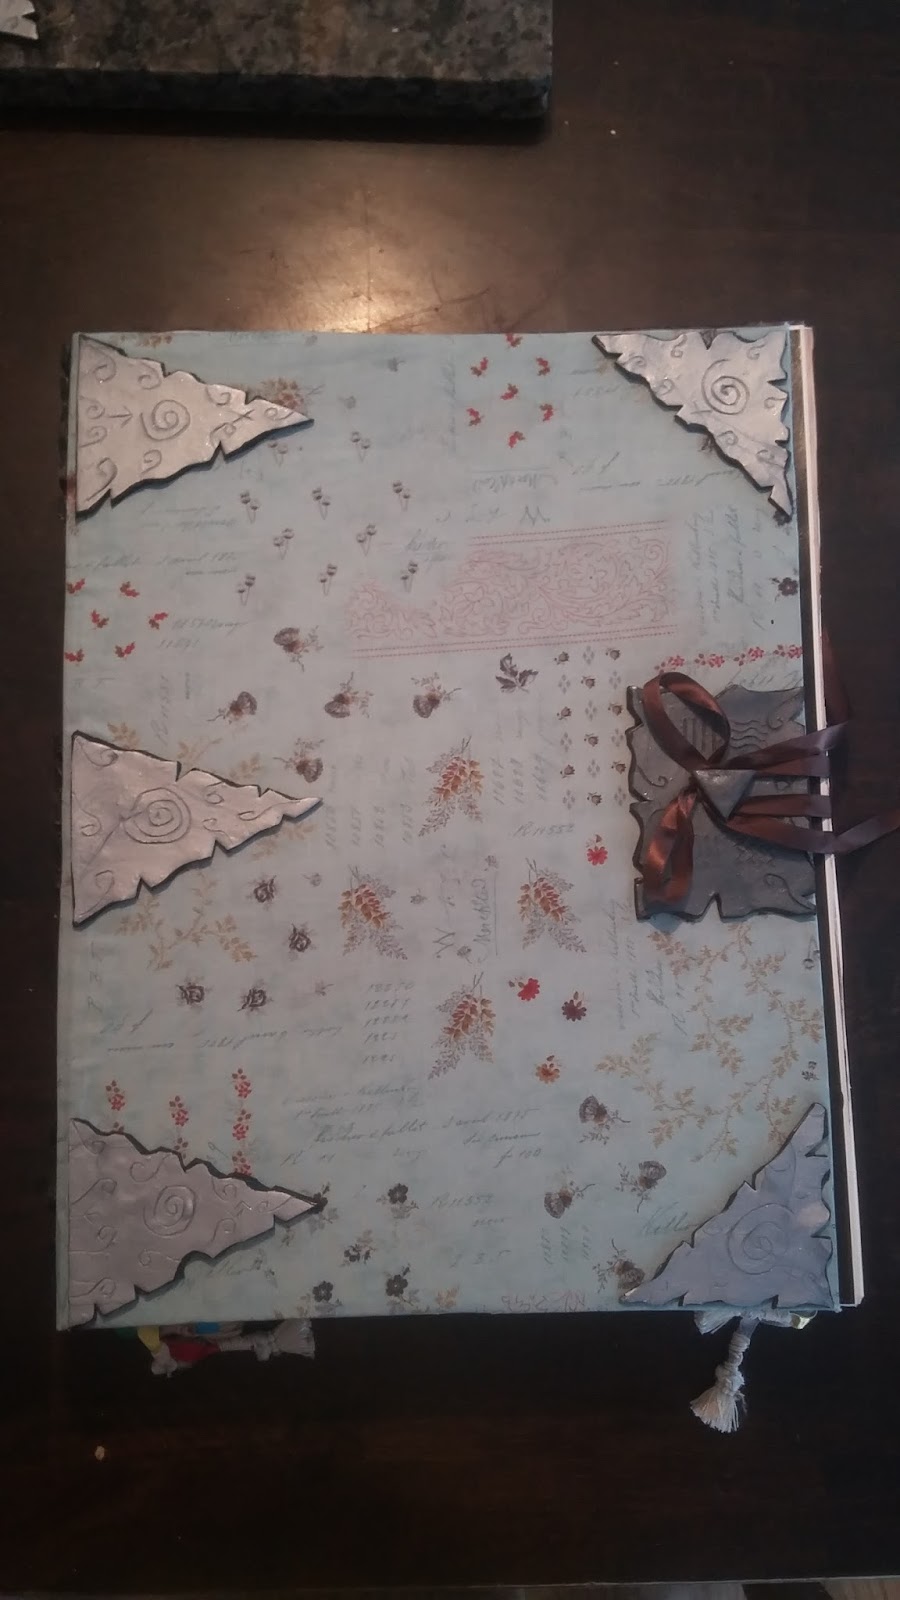
Next up I glued some silver ribbon (for Moon) to cover the canvas part near the pages. You will need to do this for one side on the front, both sides for the back and one side for middle cover.


Once that was done I chose to add our family totems to use as Illustrations. These were than glued to the front inside, the back inside and the middle inside to cover the brown. I also painted the very first page Black.
I then formed a clasp out of clay and decorative corners for the covers in clay as well.

Here is a link to the video of my Book of Shadows. It's on my Instagram. I couldn't post it here as it's too big of a file. But here are a few pics.


I might be interested in making these for fellow Witches. Message me if you don't want to make your own. But I suggest giving it a try. It's super magikal.
The Wolf Witch
No comments:
Post a Comment